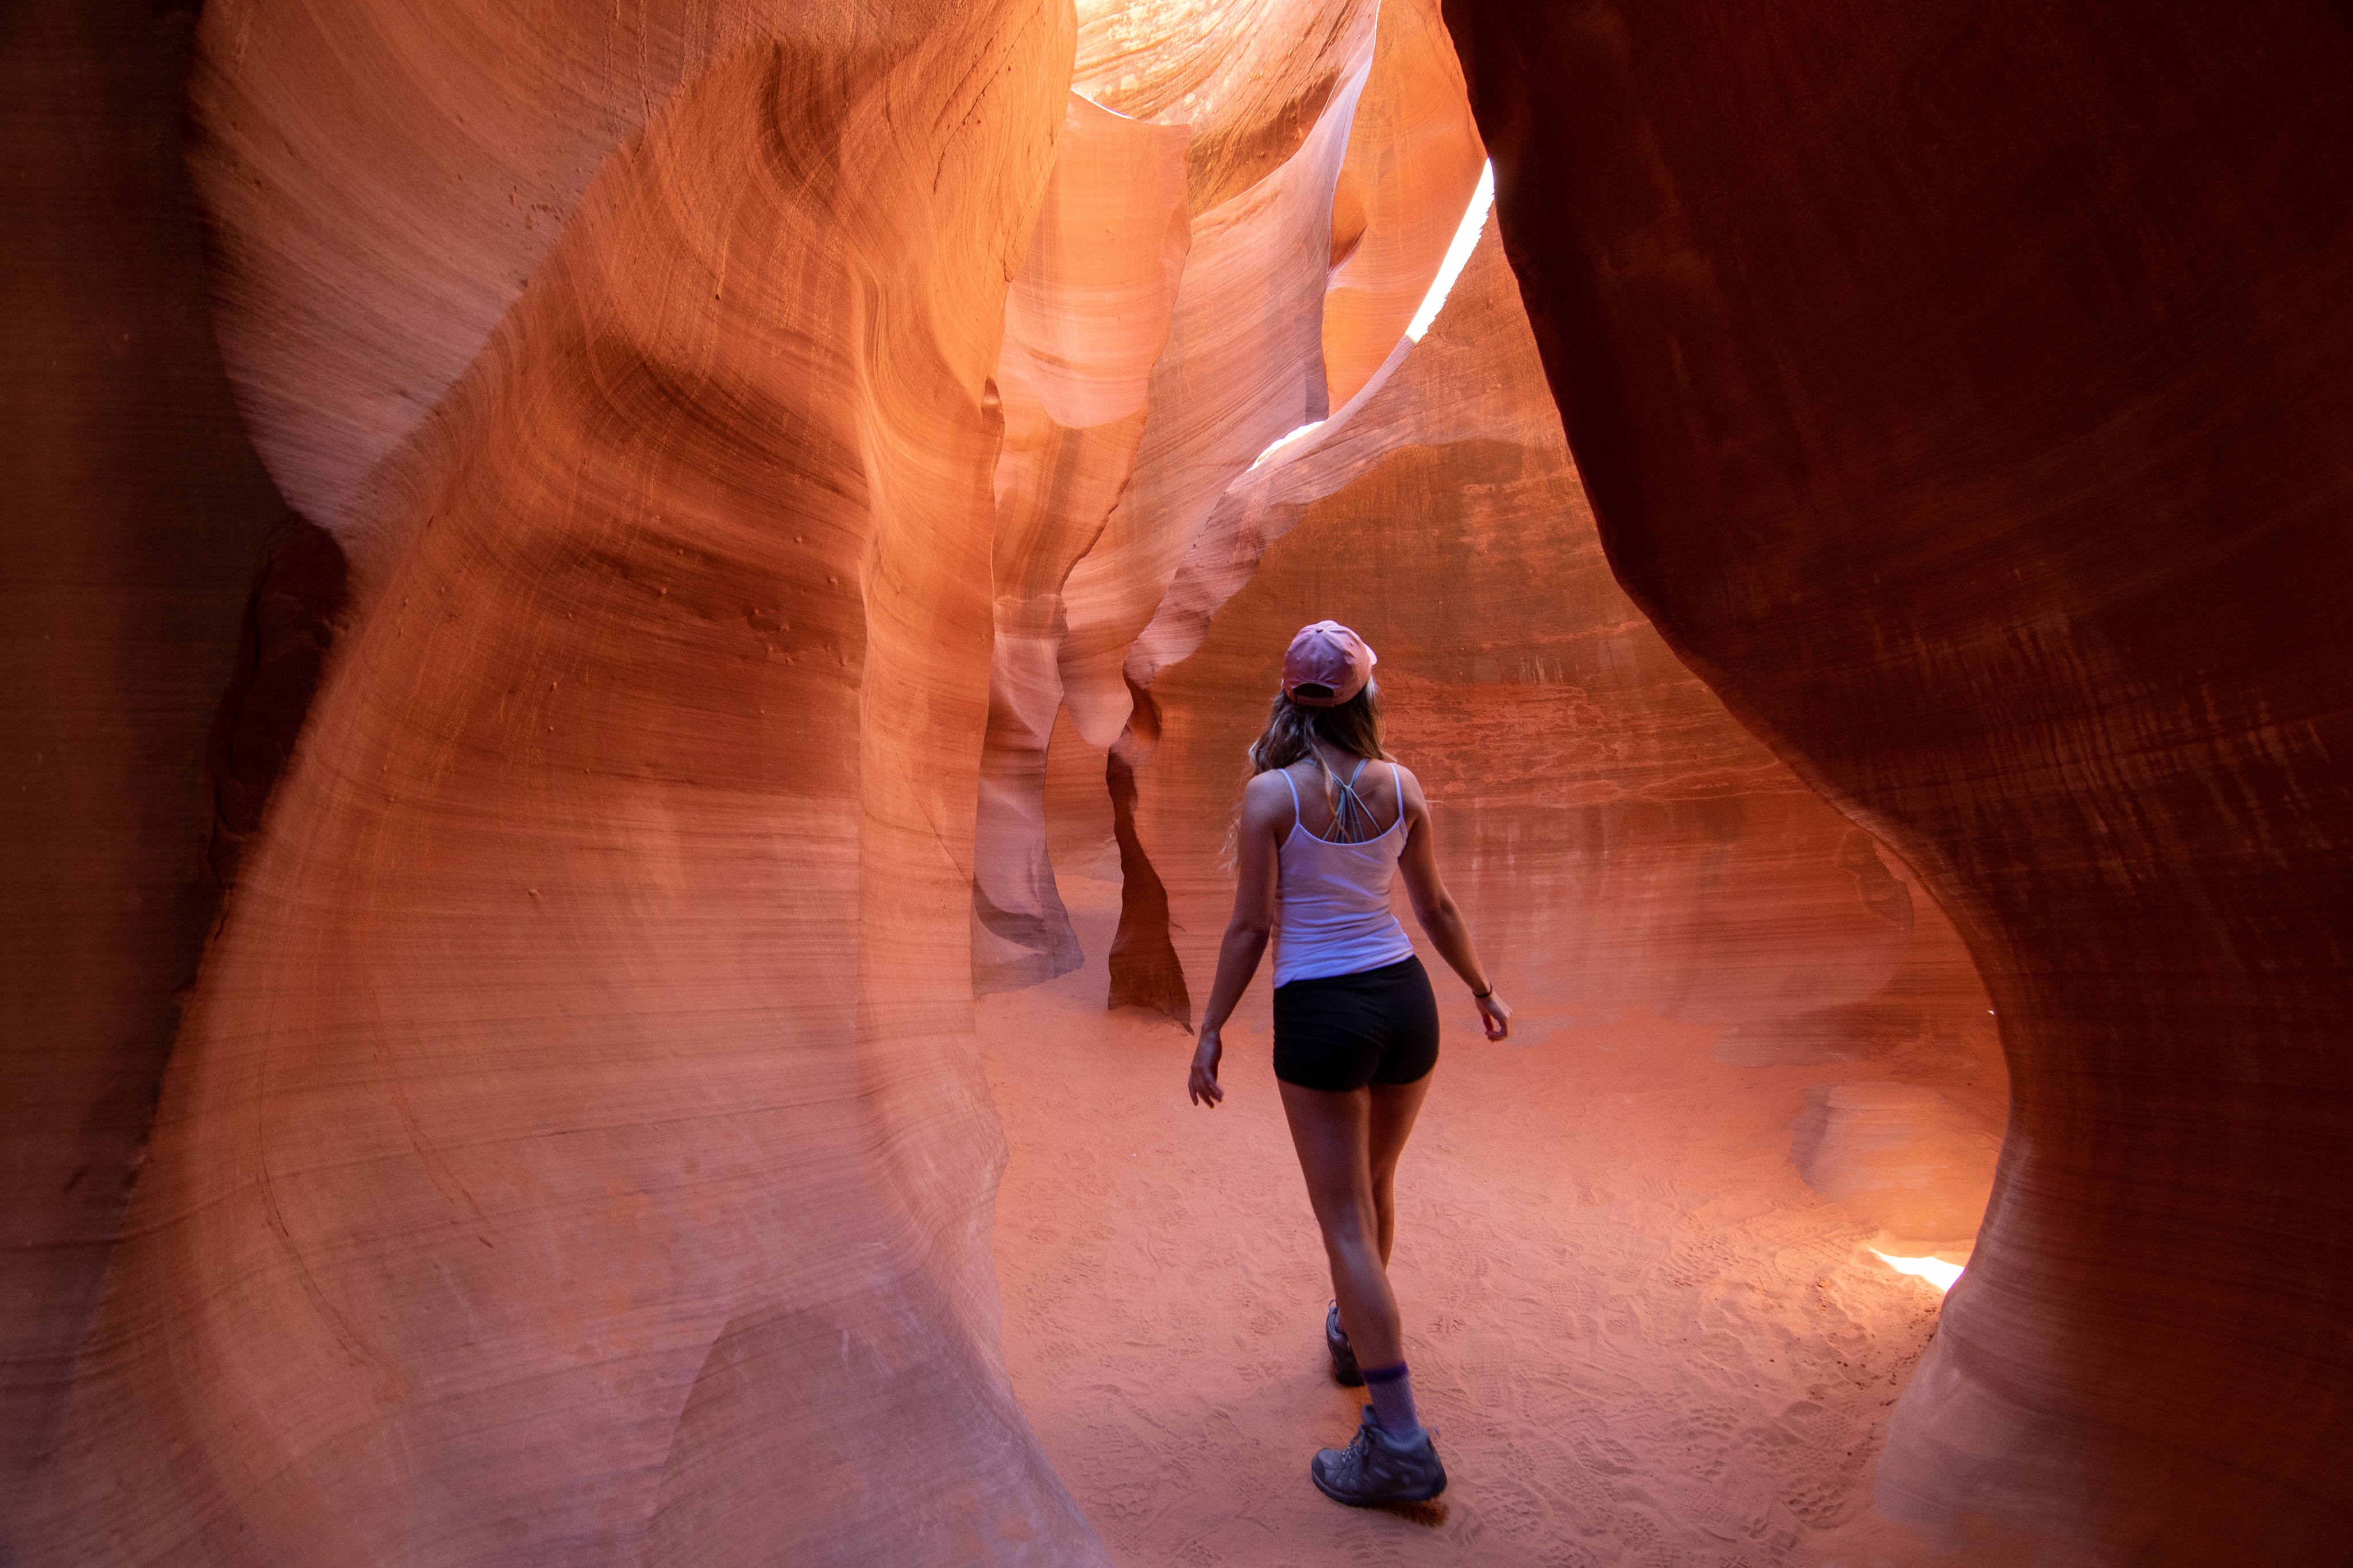
Antelope Canyon has always held a sensual allure to me. The contrast of colors, soft oranges muddled with darker browns and deep, cool blues paired with the ever elusive but beautiful light beams held onto my heart and wouldn’t let go.
And then there’s the crimson phantom photograph by Peter Lik (did you know that gorgeous print actually sold for $6.5 million?!). One look at that piece and I immediately added Antelope Canyon to my bucket list.
As beautiful and mysterious as this slot canyon is, unfortunately, due to heavy tourism, its difficult to know what experience you’ll get. Sometimes the canyon is overrun with people, often tours sell out and then there’s the fact that, depending on the tour you sign up for, you might not be able to get the photographs you really wanted.
Luckily for you I’ve been through all of this and am offering my tips on how to best navigate the ins and outs of all things Antelope Canyon.

Prepare: What You Should Know
Canyon Options: There are two options Upper Antelope Canyon and Lower Antelope Canyon.
Upper Antelope Canyon:
–Length: 200 meters long
–Shape: A-shaped (top is very narrow; base is wider)
–Tour details: Must sign up for a tour
–Options: Options for photography tour (more expensive, less people, more time for photographs – requires certain skill level)
–Colors: darker, deeper oranges, reds, blues due to less light
–Secret Tip: Go here mid-day if you want to capture light beams
Lower Antelope Canyon:
–Length: 400 meters long
–Shape: V-shaped (top is wide; bottom is very narrow)
–Tour details: Must sign up for a tour
–Options: Options for regular, private or photography tour
–Colors: mix of both light and dark oranges, yellows and purples due to more more light
–Secret Tip: Aim for just before noon for optimal light
Rules and Regulations
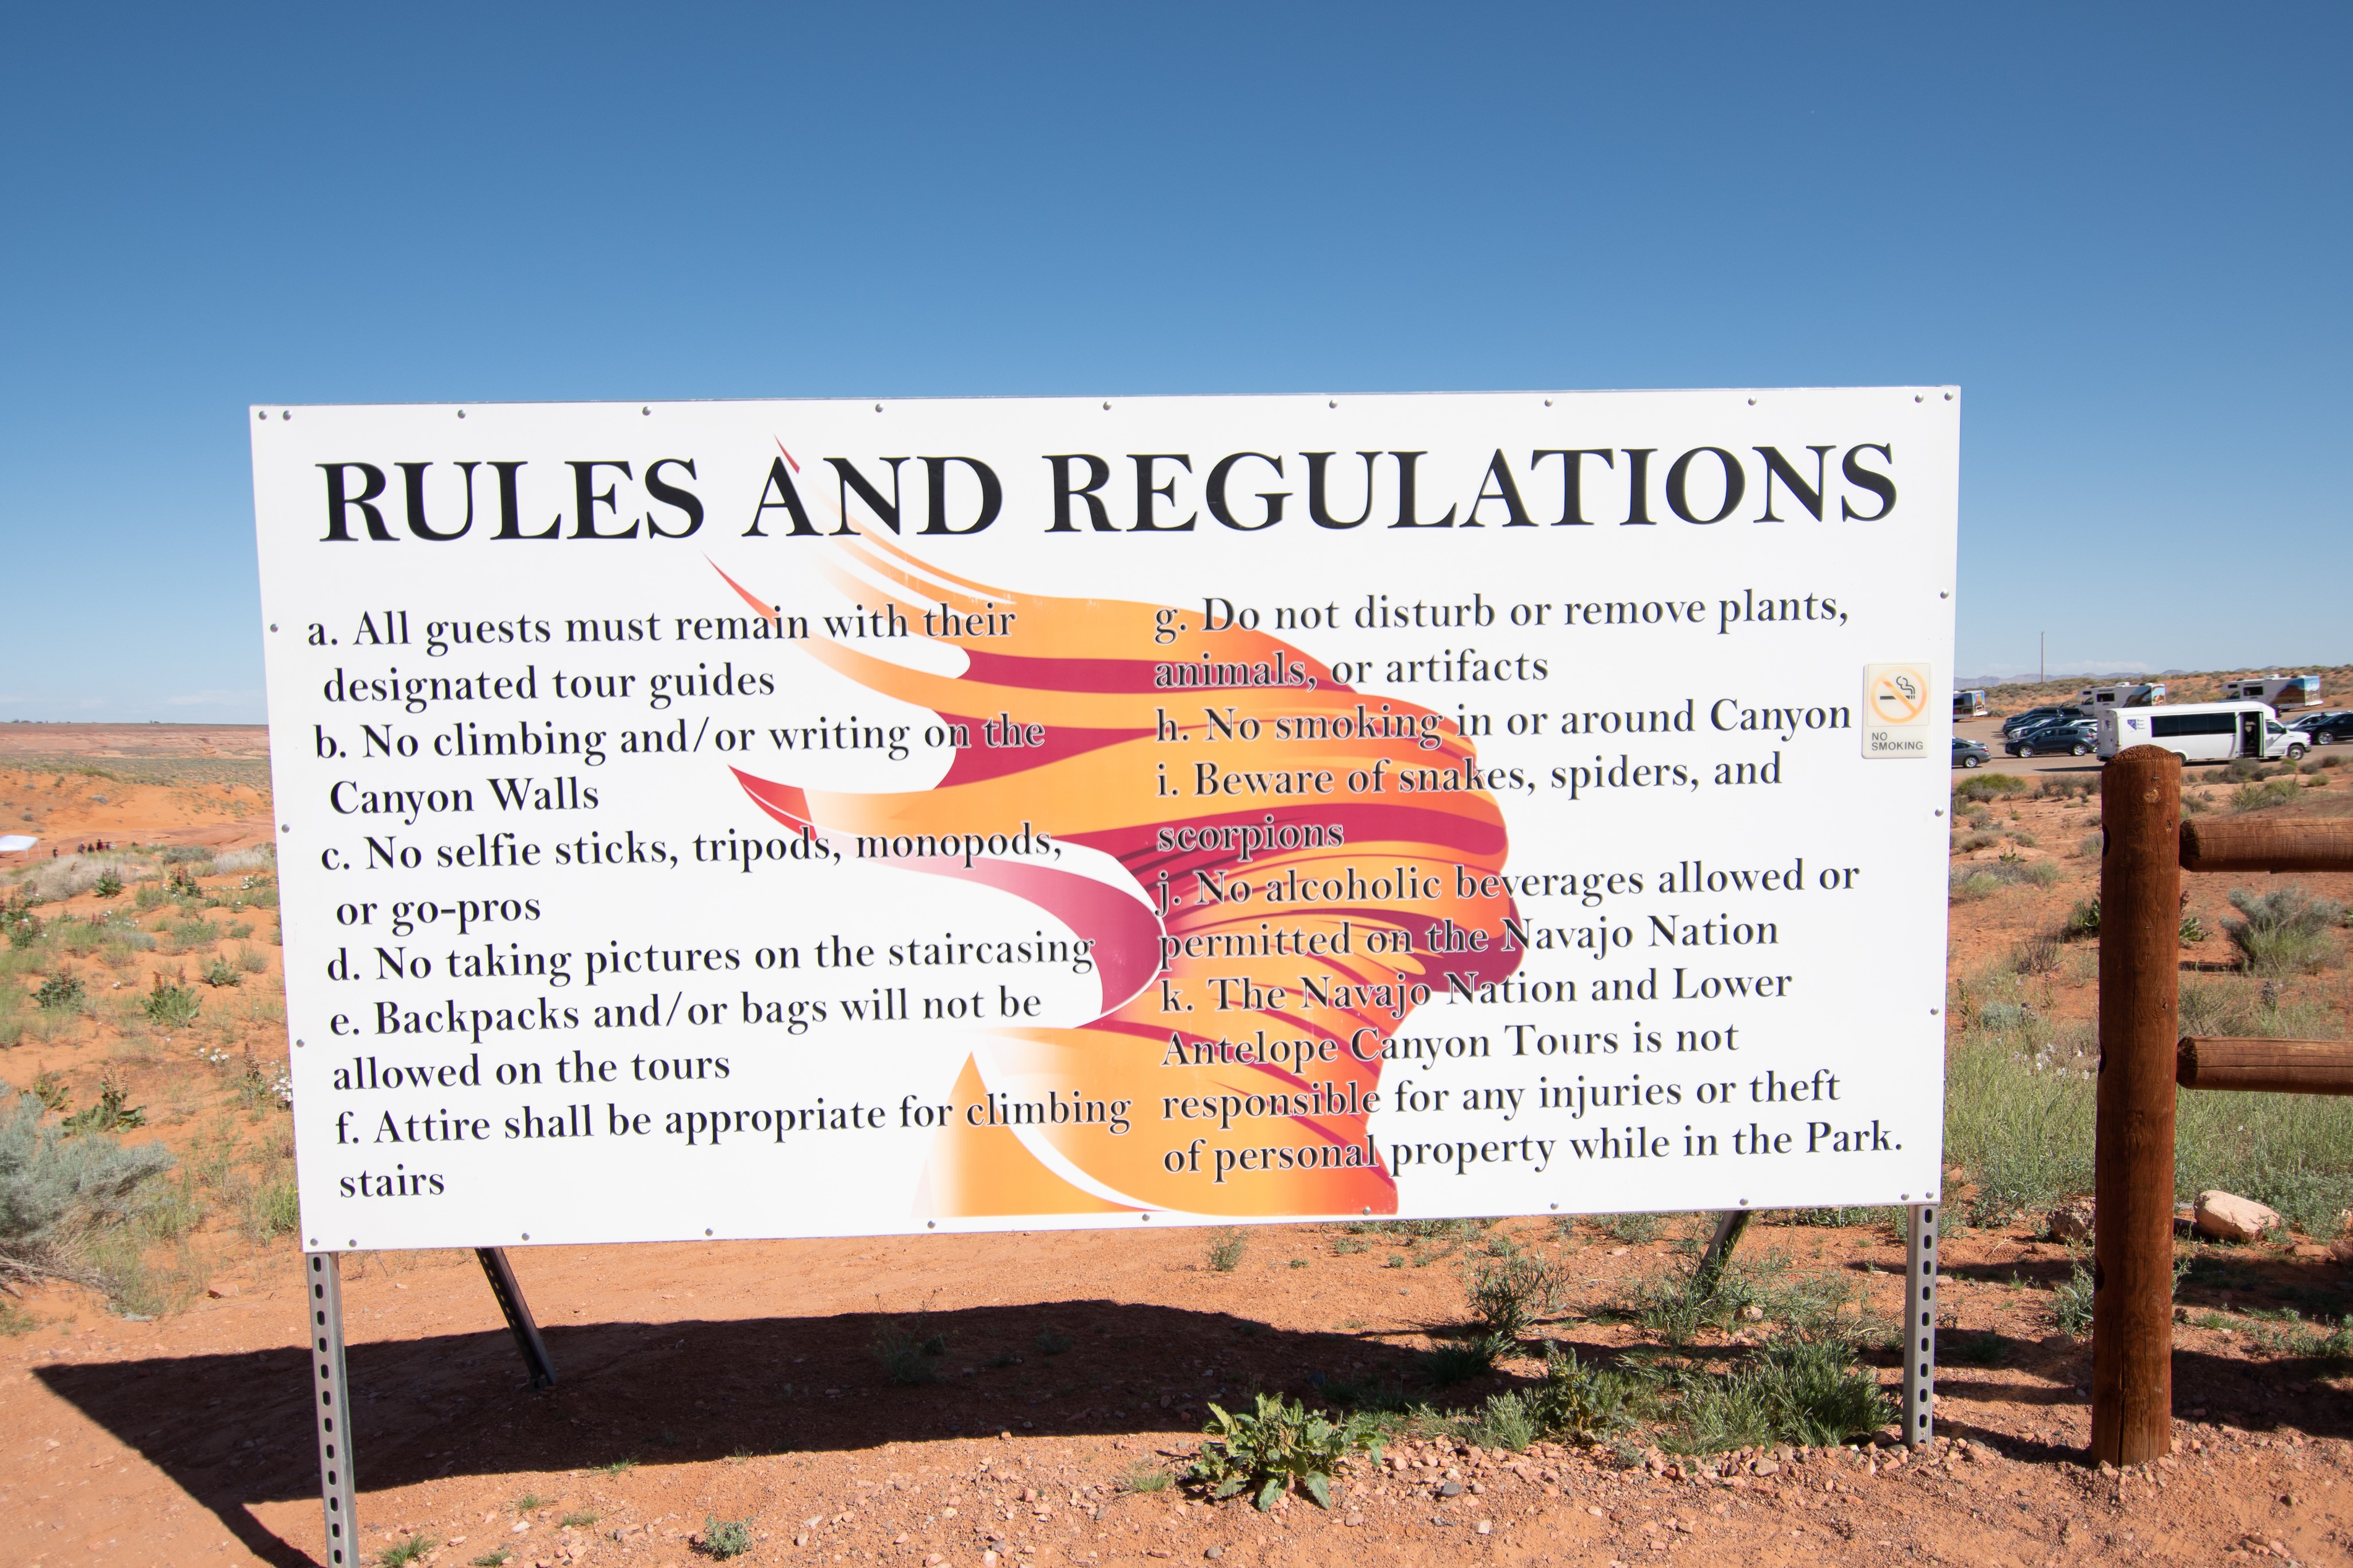
Ensure you’re all prepped before venturing into your canyon of choice.
- Drink water beforehand as you can’t take water bottles of any kind into the canyons.
- Go to the restroom before as well. There are public restrooms available for use at the start of the trail too if needed.
- Leave your gear/backpack at home – you can’t take these with you into the canyon.

How Do I Capture the Canyon in Photographs?
I know you’re thinking it: wait, how do I capture those gorgeous color hues, the lines of the rock, and all that warm light? Don’t worry, I got you covered.
Here’s the skinny on what you need to know about taking photographs in Lower Antelope Canyon based off of what gear my boyfriend and I used.
- Camera: Nikon D500
- Lens: Tokina AT-X116 Pro DX II 11-16
- Settings (ex. used on image above ): ISO500 11mm F/6.3; exposure 1/50 sec
- Prep your camera beforehand as you will need to snap pictures fast since large tour groups will be filtering in and out alongside yours. You will probably only have 10-20 seconds in each section of the canyon to get a shot so get ready!
- If you’re using a DSLR make sure that you’re capturing raw photographs.
- Aim up! The regular tours are crowded so do your best to shoot upwards to avoid getting random people in your pictures.
- If you’re doing the regular Lower Antelope Canyon tour ask your guide for help on which settings to use for your phone/camera. They’re super knowledgable so tell them exactly what you want in your photograph and viola!